Changing hair from brown to blonde
In this post, we are going to explain how simple it is to change the color of hair in Photoshop. The procedure we will be adapting here is easy to understand and apply. If you are considering, going for shading yourself and need to see what it would look first – this tutorial will help you to know it.
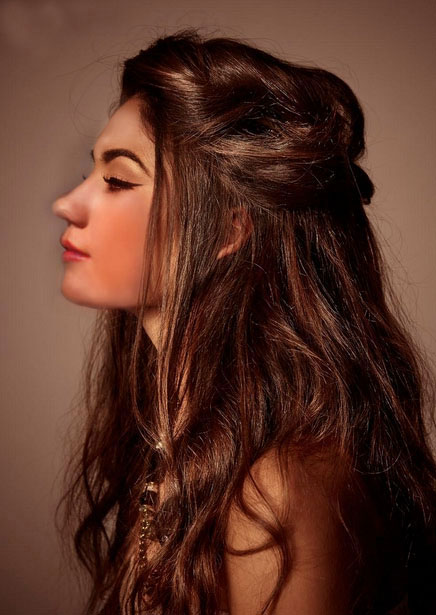
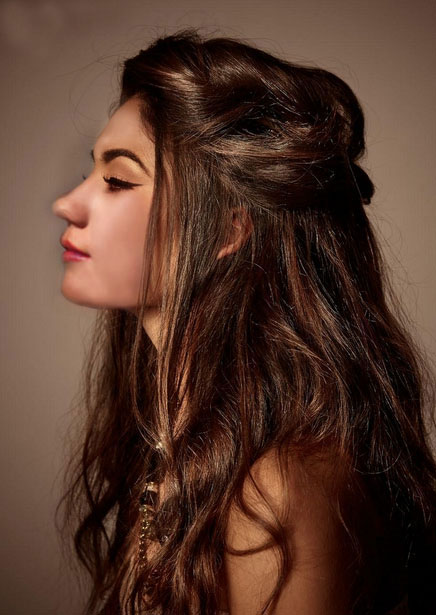
Here's the picture we will be utilizing for picture hair color changing tutorial:

Original picture
With our picture open in Photoshop.
First Step : Open "Hue/Saturation" Adjustment Layer
There are two ways to open the pallet. Go to menu "Layer » New Adjustment Layer » Hue/Saturation". Alternatively, click on the New Fill or adjustment layer icon at the bottom of the Layers palette (the circle splits diagonally between black and white, circled that tool in magenta color):
New Adjustment Layer clicks on icon in magento circle
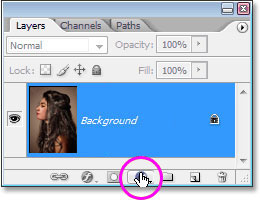
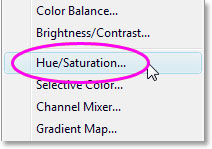
In "New Adjustment Layer" click on icon in magenta circle. After clicking on that icon, select "Hue/Saturation" from the list.
Click on "Hue/Saturation"
Second Step: Tick the "Colorize" check box
Once the Hue/Saturation dialog box opens, tick the "Colorize" check box option in the extreme bottom right corner.
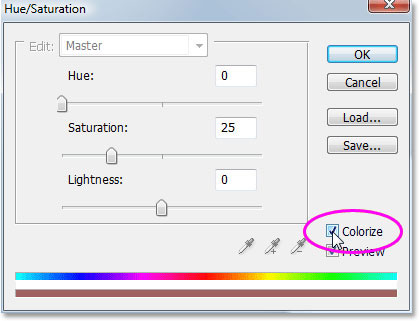
Tick the "Colorize" check box.
Once check the "Colorize" option, you will notice color of the entire picture changed with a shade of shining magento.
Third Step: Make a different color for the hair
Scroll the Hue slider right/left to choose the shade you need to use for the individual's hair. For now, you'll be colorizing the whole picture, we'll correct that in the following few steps. Simply overlook whatever remains of the picture and concentrate just on the hair. When you've reached shading you like, adjust the intensity level of the Saturation by dragging slider right or left. Scrolling it to the left or right gives different saturation.
Color and saturation can be changed easily later, so need not to worry about that. For the time being, set hue amount 9 and expand saturation to about 54.
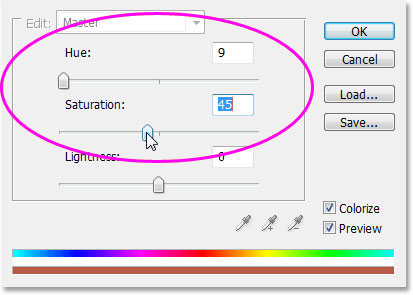
Utilize the Hue slider to choose a new color shade for the hair and dense the color with the Saturation slider.
Click OK to exit the dialog box. You will notice entire image has colorized in magenta.
Entire image became redish.
Fourth Step: Fill up the Hue/Saturation Layer's Mask with Black
An important aspect regarding change layers in Photoshop is that each one consequently accompanies its own particular layer veil, and we're going to utilize it to settle the issue we presently have with our whole picture being colorized when all we truly need is for the hair to be colorized.
To begin with, we should totally cover the impacts of the Hue/Saturation adjustment layer by filling its layer cover with dark. Since dark is our current Background shading and the layer cover is chosen (Photoshop default chose the layer mask for us when we included the conformity layer and set our Foreground and Background hues to white and dark, separately), we should do nothing more than utilize the console alternate way Ctrl+Backspace to fill the layer mask with black.
When we do that, the colorizing impact vanishes from our picture and on the off chance that we look in the Layers palette, we can see that the alteration layer's thumbnail, which issues us a sneak peak of what the layer cover resembles, is currently loaded with dark:
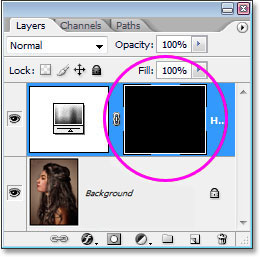
The layers panel demonstrating the layer mask thumbnail for the Hue/Saturation alteration layer now loaded with black.
Fifth Step: Pick the Brush Tool
To begin with, we require the Brush tool, select it from tools palette or use shortcut, press letter B on your keyword. To apply the colorizing effect only to the hair, all we need to do is apply brush with white on our layer mask over the hair. Anyplace we brush with white on the masked layer will uncover the impacts of the Hue/Saturation adjustment layer, anyplace we leave black will keep the impacts covered up.

Circled, Brush Tool
We have to paint on the layer mask to uncover the colorizing impact on the hair. Photoshop default open with Foreground color to white and background color to black. (The color pallet on the right is the Background color and the color pallet on the left is the Foreground color):
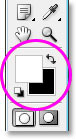
Black as our Background and White as our Foreground color.
Sixth Step: Brush with white over the hair
With our brush tool, Hue/Saturation and white as our Foreground color selected, everything we need to do now is brush over the hair. To change to your brush size to use left/right bracket key on your keyboard, left bracket to make smaller and right bracket for make bigger size. At that point simply brush over the hair to bring back the colorizing effect.
Clip the area using path, Brush with white over the hair to reveal the colorizing impact from the Hue/Saturation layer

To correct the stray hair, go up to option bar at the highest point of the screen and bring down the opacity of the brush to around 20%.
Bring down the measure of your brush so no bigger than the space you are colorizing and brush over it several times. By this process, the color won't be dark in that zone. Zoom in on those areas to have a very close look at your work. You can select the ZOOM tool, pick this using Z on the keyboard.
Close up view of image.
Please check the image at actual pixel (100%), right click your mouse with zoom tool selection and you will see "actual pixel" option.
While you are brushing the area, there is a possibility you brush an area out of range you didn't't intend to, make the foreground black to restore the unwanted area, press X to swap foreground and background color, brush over the unwanted area until the restore slip-up area.
The hair is now colorized
Seventh Step: Blend mode should be "color or soft light"
The main points are carried out! We've colorized the hair while leaving whatever is left of the picture untouched on account of the layer mask that came with hue/saturation adjustment layer. Now adjust the effect and the by begin with changing the blend mode, by default it is set to "normal" and it meets expectations well, still we can do better. In blend mode option, select either color or soft light from the list
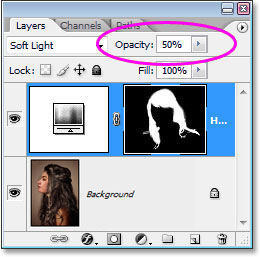
Bring down the opacity of layer for a more for natural colorizing.
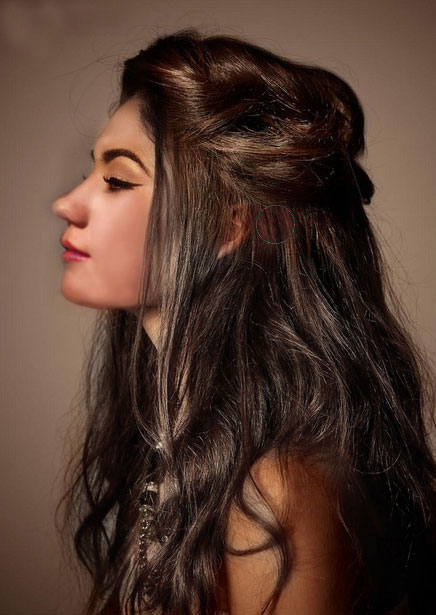
Blend mode in soft light gives us more natural colorizing effect it not only makes it needed color of the hair as well boost the shining, which I think work better than the any blend mode option in this case. As you can see in below picture mode set to "Soft Light".
The picture with the layer set to Soft light in blend mode, giving us a more natural effect.